Breathe New Life Into Your Home: How to Refinish Old Wooden Furniture Like a Pro!
Have an old wooden chair or table of mine that has seen better days? Don’t throw it away—refinish it! Fixing up wooden furniture to look like new again is a great DIY project that saves you money and refreshes your space with a customized, personal touch. Whether you have an old family heirloom or something you found at the thrift store, you can repurpose it into something beautiful with a little effort. Ready to get started? So let’s go straight to how to refinish your old wooden furniture!
What You’ll Need:
- Medium and fine grit sandpaper
- Stripping agent (for removal of previous paint or stain)
- Wood stain or paint
- Paintbrushes or foam brushes
- Clean clothes
- Polyurethane, varnish, or wax wood finish
- Protective gloves and goggles
- Drop cloth or newspaper
Step 1: Clean the Furniture

Clean the Furniture
- Clean the piece with a damp cloth to clear away dust and dirt.
- For stubborn grime, use a few drops of soap in water.
- Allow it to dry fully before continuing on to the next step.
- You do want better results, right? Make sure the surface is clean!
Step 2: Remove Old Finish
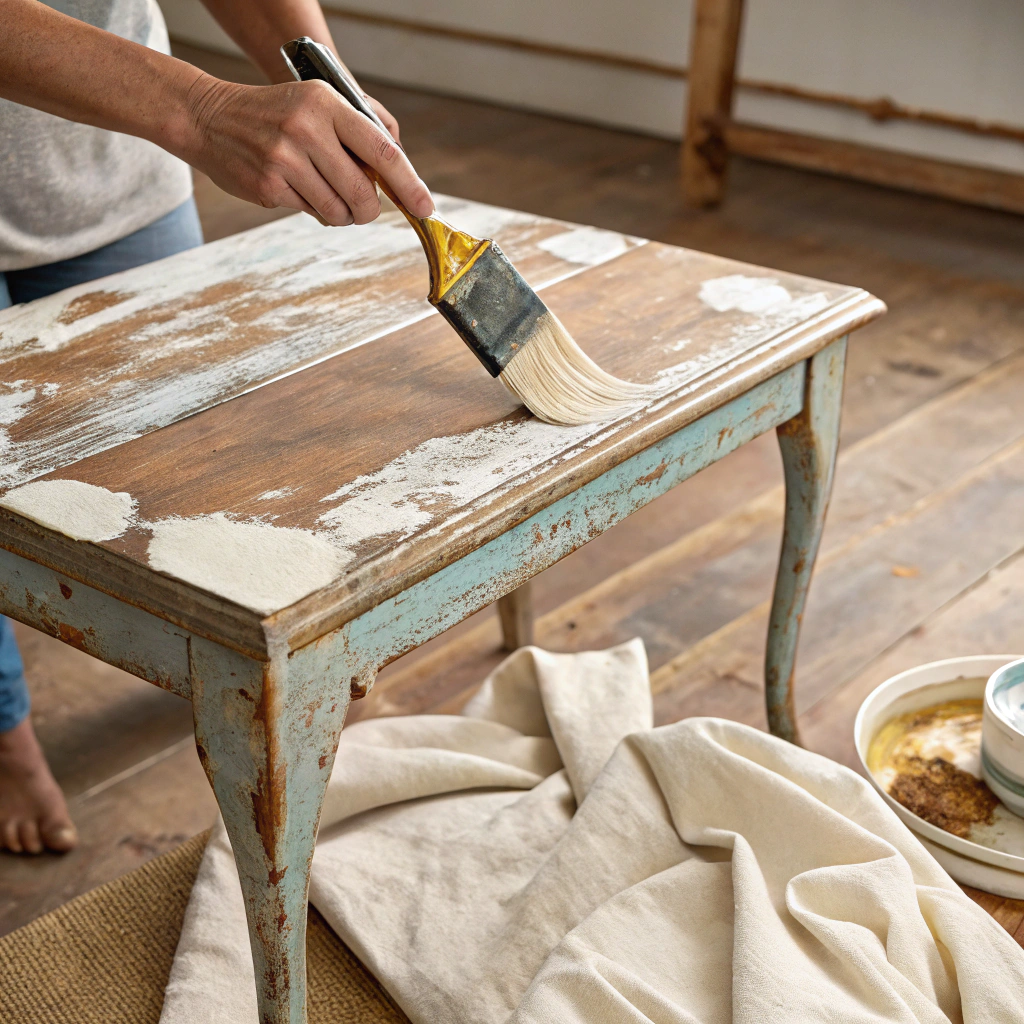
Remove Old Finish
- If there is ruined paint or stain on the furniture, use paint strippers.
- Be sure to carefully follow the product instructions.
- Once the finish has softened, scrape it off with a scraper.
- PS: Lightly sand the surface to even it out.
- Take your time—this step is important for a professional finish.
Step 3: Sand the Surface
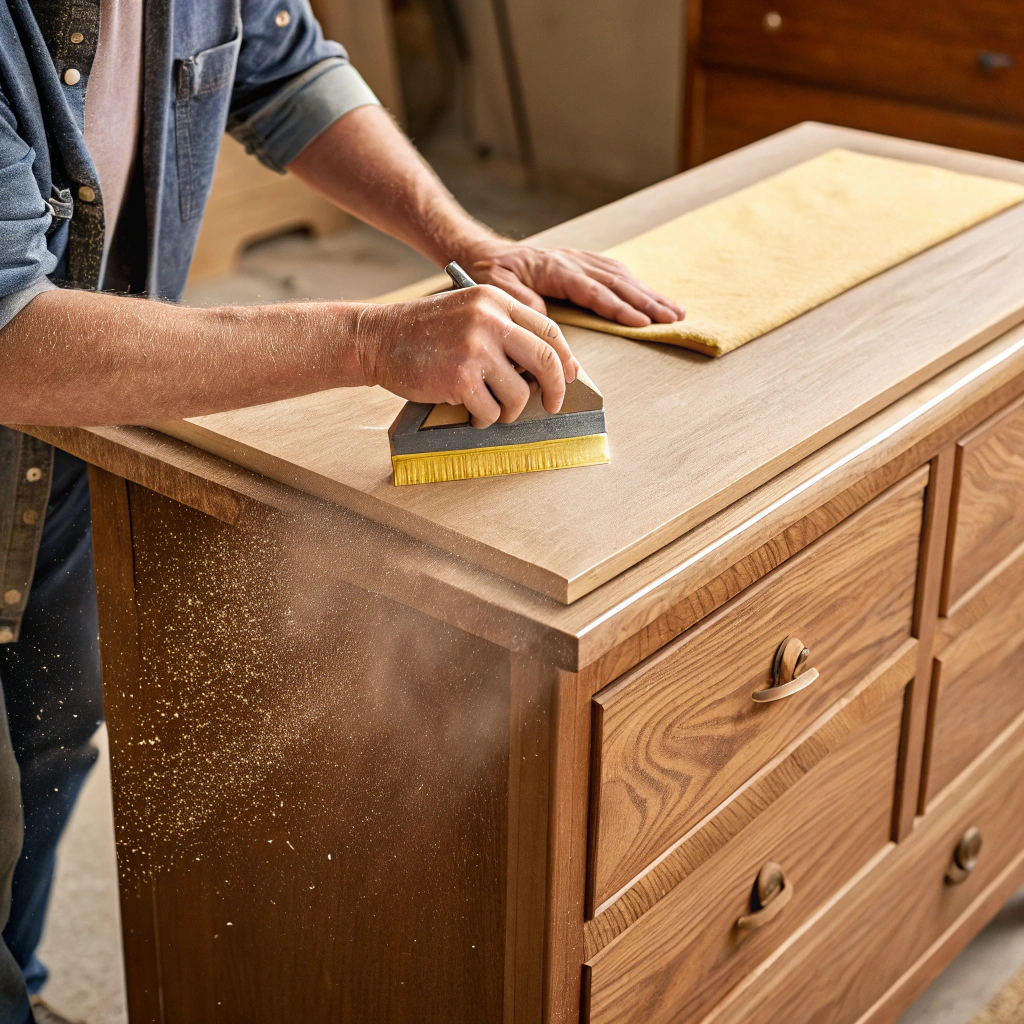
Sand the Surface
- Use medium-grit sandpaper to smooth out imperfections.
- Using fine-grit sandpaper, smooth out the surface.
- Sand with the direction of the wood grain to avoid scratch marks.
- Dust off with a fresh cloth.
- Smoother surfaces help in staining or painting.
Step 4: Apply Stain or Paint

Apply Stain or Paint
- Select a wood stain or paint that matches your decor.
- Use a brush or foam brush to spread evenly.
- Allow it to dry according to the product directions.
- Add a second coat for a deeper color, if desired.
- Now here is where your furniture gets really cool!
Step 5: Seal the Finish
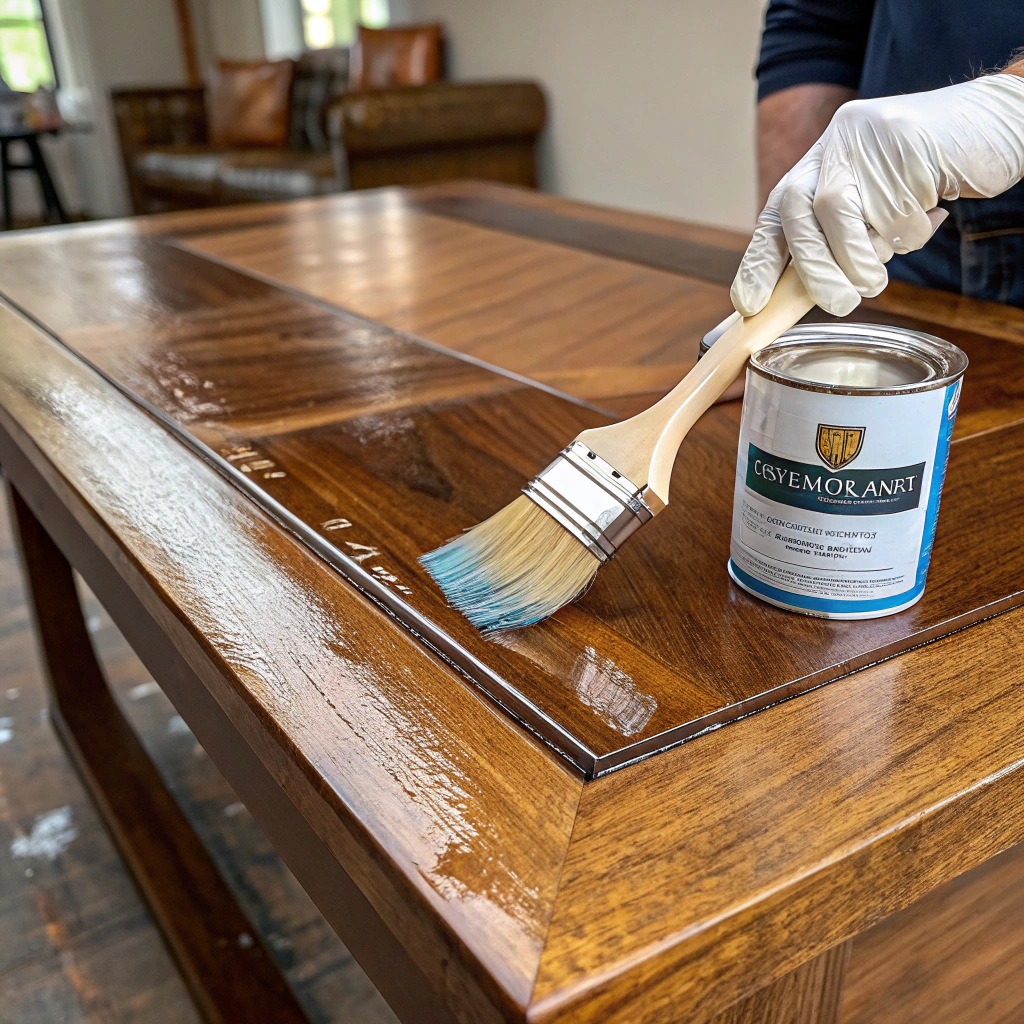
Seal the Finish
- Finish the wood with polyurethane or wax.
- It seals the surface and provides durability.
- Use a clean brush, and work it in thin, even coats.
- Make sure it dries fully between layers.
- A proper sealant keeps your work vibrant for years to come.
Step 6: Add Personal Touches
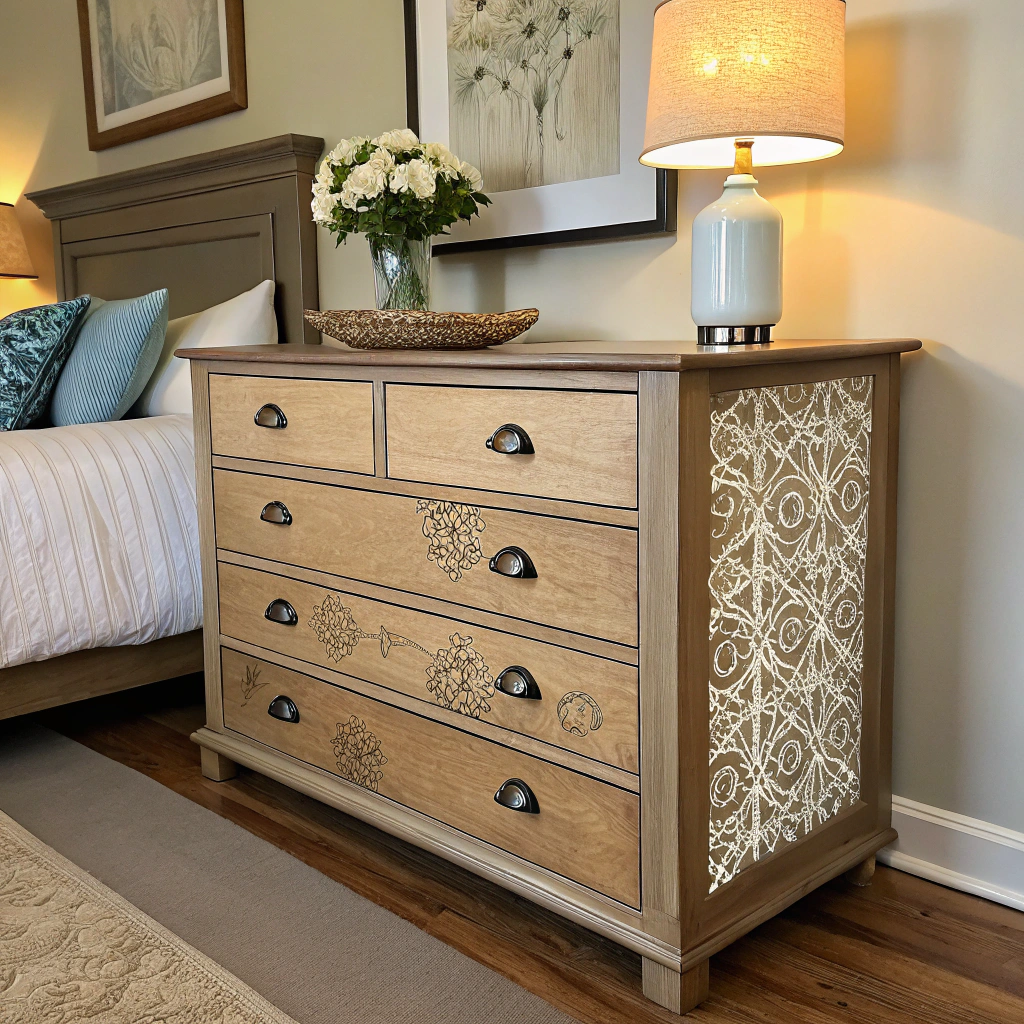
Add Personal Touches
- You might also consider decorative elements—stencils or decals.
- Update old hardware with new knobs or handles.
- For a vintage look, lightly distress the edges.
- Make it uniquely yours!
Step 7: Reap the Rewards of Your Efforts

Reap the Rewards of Your Efforts
- Position your furniture in its new location and admire your craftsmanship.
- It’s now a lovely and functional part of your home.
- You helped save money and made something unique.
- Refinishing is a win-win!
One of the most fun and useful home improvement projects is refinishing old wooden furniture. With a little time and energy, you can transform faded pieces into eye-catching centerpieces.
So pick your tools, get creative, and rescue your furniture. Your home will thank you!
")

")

")
")
")
")